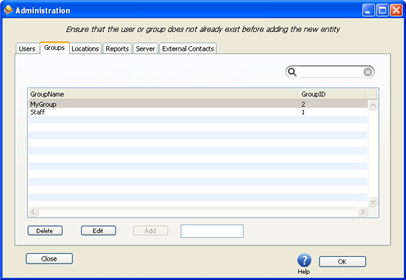
Groups offers the possibility to categorize users according to the workgroup they belong to. For more information on Groups see the section called “Groups”.
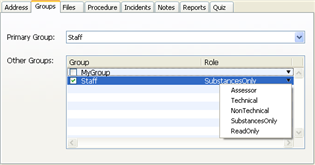
Each user can have different roles within the group or groups that they are assigned to. Users can join one or more groups and be assigned descriptive data and permission roles for use within the software. For more information on Users see Chapter 6, User Roles And Workflow.
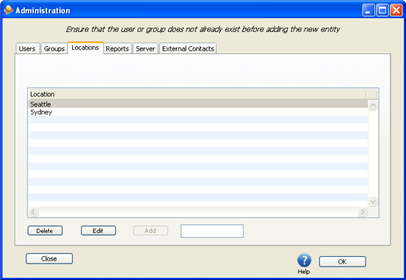
Locations are for assigning where users are, where the Procedures are being performed, and where chemicals are stored. More information about Locations can be found in the section called “Location”.
Click on the text menu at the top of the Risky Business SOS software's main window
Click on item in the drop-down menu box that appears.
When the Administration window opens click on the tab to select the Group panel.

In the white box next to the button, type in the group name "MyGroup".
Click the button to add the new group MyGroup.
Verify that the new group name now appears in the list of groups
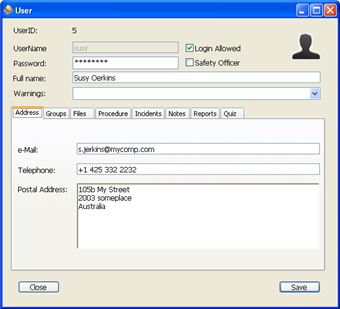
Click on the tab titled to see the Use Administration Window
In the white box next to the button, type in the name "Jerrick"
Click the button to add the new user Jerrick.
A dialog box should appear to say that you have created a new basic user. This box should also ask you to complete the specific user login details. Click to go to the User Detail Window for your new user.

In the Password box, enter in "secret" as the password for the user Jerrick to use when accessing the software.
Click on the tab to select the Group setting panel.

Click the Primary Group field and select the group named "MyGroup"
In the Other Groups list, check the box next to the name "MyGroup"
If the default group Staff is installed it might already be selected.
In the Other Groups list click on the Role field for the group named "MyGroup" and select "NonTechnical" to make the user Jerrick have the role of a non-technical user.
Optionally click on the tab to add additional information.
Click the button to record the changes that you have made to this new user.
Click on the tab to select the Location setting panel.

In the white box next to the button, type in the name "Seattle"
Click the button to add the new location "Seattle".
Optionally select the name from the list of locations and click the button to add additional information.
To return to the main software menu, close the window (click the red X for Windows or the red ball for MacOSX)